Contents
- 1 Modify Roof – (Mod-Roof)
- 2 Hip to Gable
- 3 Gable to Hip
- 4 Change-Pitch
- 5 Split Gable
- 6 Dutch Gable
- 7 Dormer
- 8 Extend Barge
- 9 Atrium
- 10 Drop-Eave
- 11 Change Eave Height
- 12 Valley/Hip Gable
- 13 Flying Gable
- 14 Slice-Hip
- 15 Project-Gable
- 16 Align-Planes
- 17 Merge-Planes
- 18 Intersect-Planes
- 19 Link-Planes
- 20 Cut-Out
- 21 Hip/Valley Dormer
- 22 Lay-Back
- 23 Highlight
- 24 Ship’s Gable
- 25 Change Gable Overhang
- 26 Cricket
- 27 Cut Line
- 28 Cut Plane
- 29 Attach-Planes
- 30 Bay-Window
- 31 Merge Edges
- 32 Insert Plane
- 33 Delete Hole
Modify Roof – (Mod-Roof)

A complex roof is a series of simple roof’s. So start with the basic shape and start adding the architectural features – use the Mod-Roof group of functions to add veranda’s, dormers, dutch gables, atriums and more, at the click of a mouse.

 Hip to Gable
Mod-Roof > Hip To Gable This command lets you change a hip end into a gable end.
After you select the command, you are prompted to locate the ridge attached to the hip. The hip end is automatically converted into a gable end. The line-types of the boundary lines are automatically changed accordingly.

BEFORE AFTER
![]() when you select the ridge, make sure you click on the ridge line close to the hip end you want to change. Otherwise, if there is a hip at the other end, you might get the other end changing.
when you select the ridge, make sure you click on the ridge line close to the hip end you want to change. Otherwise, if there is a hip at the other end, you might get the other end changing.
After the change is made, the eave line under the gable is tagged as “None” and the rake lines as Barge.
 Gable to Hip
Mod-Roof > Gable to Hip This command lets you change a gable end into a hip end.
After you select the command, you are prompted to locate the ridge attached to the gable. Then you are prompted to enter the pitch of the hip end. After that, the gable end is automatically converted into a hip end.

BEFORE AFTER
The line-types of the boundary lines are automatically changed accordingly.
 Change-Pitch
Mod-Roof > Change-Pitch This command allows you to change the pitch of one or more roof planes.
After selecting the command, you then select one or more planes. When you have finished, click the right mouse button. Then you must enter the new pitch for the planes. After you have done that, the planes are recalculated.
It is intended that only small changes in pitch are assumed. If you enter a large value, then the roof plane will still try to fit, but adjacent planes may not update as you desire.
To select a plane, you can either select the tick mark in the corner of the plane or turn on the hatching of the planes by selecting Tools > Show-Planes, then select the plane(s) to change.

 Split Gable
Mod-Roof > Split Gable This command attaches a gable roof to an existing gable end.

When you select the command, you are prompted to locate a ridge at the gable end. Then the Split defaults dialog box is displayed. This provides parameters for you to set values for the new gable.

Fixed side
This toggles between Left and Right and assumes you are looking to the gable from the outside. If you select left, then the left hand side of the new gable aligns with the left hand side of the existing gable and conversely for the right hand side.
Side for the new ridge
This toggles between Left and Right, again as viewed from the outside, looking in. If you select Left, then the ridge of the new gable will be to the left of the existing ridge and conversely for the right hand side.
Ridge offset
This is the amount the ridge will be offset.
Depth
This is the depth (length) of the new gable roof.
Tuck under
This is the depth that the offside of the new gable will project under the main roof.
After you click [OK], the new roof is drawn as well as merged with the existing roof.
The following diagram shows a split gable attached to a gable roof.

BEFORE AFTER

![]() Quick tip: the software needs the ridge offset value to construct the Split-Gable, and this dimension is rarely provided.
Quick tip: the software needs the ridge offset value to construct the Split-Gable, and this dimension is rarely provided.
However, it is easily figured out:


Dutch Gable
Mod-Roof > Dutch Gable (a.k.a. ‘Boston Hip‘)
This command creates a Dutch gable on a full hip or a flying hip. You need to know the horizontal distance from the base of the hip to the face of the new gable.
After you select the command, you are prompted to locate the ridge at the hip end. You will then notice a flashing line at the base of the hip that gives you a reference to measure from.
Also, the Dutch Gable defaults dialog is displayed which allows you to set the Dutch gable parameters.

Distance of gable from base of hip
This is the distance from the flashing line to the face of the gable. A value of zero will put the face of the gable at the base of the hip. A positive value offsets the face of the gable towards the ridge apex you selected. A negative value offsets the face of the gable to the other side.
Gable Overhang
This is the verge overhang of the new gable. The base of the gable is automatically assigned as an apron flashing.
The diagram below demonstrates the creation of a Dutch gable.

BEFORE AFTER

A fine example Dutch Gables on a roof with various eave heights, in addition to barge(rake) lines above the main door.
 Dormer
The Mod-Roof > Dormer command allows you to draw a dormer in one of several styles. The styles available are Gable, Hip, Single Slope and Barrel.


In isometric, the dormer styles appear below:

To create a dormer, click the Dormer command. You are then prompted to select an eave. Selecting the eave also selects the roof plane the dormer will effect as well as the orientation of the dormer. The point at the end nearest where you selected the eave line begins to flash, giving you a point of reference for placement of the Dormer.
Gable and Hip Dormers
The Dormer defaults dialog is then displayed, letting you set the dormer parameters.
These parameters refer to Gable and Hip dormers:

The Dormer dialog, along with many other larger and sometimes more complex dialog boxes, has two modes – a Full display and a Simple display. [More] and [Less] buttons to hide the less used functions of the software until you need them. This cleans the interface up and provides a simple user experience for first-time users.

Type of Dormer This is the style of the dormer which is one of Gable, Hip, Single Slope or Barrel dormer.

Typical hip dormer
Pitch This is the pitch of the dormer planes.
Distance to Dormer Centre/ Distance to Edge This is the distance along the eave to the center line or ridge of the dormer. This is the distance from the flashing point. Alternatively, this is the distance to the eave edge of the dormer and the width of the dormer measures from this edge. The function is a toggle button.
Setback from Eave This is the distance from the eave to the face of the dormer.
Dormer Width This is the width of the opening in the roof for the dormer.
Side Length/ Height Above Eave This is the length of the straight projection of the dormer. This toggles to Height of Dormer Gutter if you want to fix the dormer by relative height to the eave line it is attached to.
Front Overhang This is the overhang of the gable end.
Side Overhang This is the eave overhang on the sides.
Gap Width This is the width of the gap that will be created from the face of the gable to the eave (or more exactly, to a distance from the eave based on the next value).
Gap Offset to Eave Gap This is the distance from the eave to the gap (as above).
Side Style This is the style for the eaves of the gable dormer. “Both horizontal” is the default but you can have “Project left”, “Project right”, or “Project both”.
Dormer Material This is the material category that you want to apply to the dormer planes – Metal, Tile, Shingle, Low Slope etc.
Eave Type This allows you to select the type of eave you want on your dormer, Fascia & Gutter, Gutter Only, Fascia Only & None.
Draw Side Walls? If Yes, then the front and sides of the dormer are drawn also. If No, they are not drawn. You may not want to draw the sides if the dormer projects past the eave line.
Insert at Apex of the hips, or at a position along a hip. See below for a further discussion.
Insert along Hip This lets you insert a dormer along a hip like a flying gable. See below for a further discussion.
Preview This allows you to preview the insertion of the dormer before committing to insert it.
Dormers at Hip Apexes
To insert a dormer wedged at the top of a hip, you first select the “Insert at apex” button, then snap to the point at the hip apex. The dormer is then drawn in preview mode, ready for you to either accept or change the parameters. The dormer dialog box is also changed to display the following parameters.

Here you can change the offset from the eave to the face of the gable and you can change the width. You will notice that these two fields are now toggle buttons.
If you click them, the dialog box is changed to look like the following:


Now you can set the offset to the gable with respect to the base of the higher hip. You can also force the dormer to adopt the width at the face of the dormer from hip to hip. In this way you can use this approach to create dutch gables.
In effect, using this approach, the ridge apex point is fixed in position.
Insert Along Hip
When you click this button you are prompted to locate a hip line, then enter some initial fixing values.


You enter the distance from the eave to the face of the dormer gable. You then enter the distance from the top of the hip to the ridge intersection with the dormer. After you click [OK], the Dormer Defaults dialog box is displayed. Changes you now make to the fixing parameters assume that the ridge apex of the dormer remains in a fixed position.
You would use this approach to create gables on hips much like the Modify Roof > Flying-Gable command.
Single Slope and Barrel Dormers
For a Single Slope dormer, you get the following dialog box.

Type of dormer This is the style of the dormer which is one of Gable, Hip, Single Slope or Barrel.

Typical single slope or ‘skillion’ dormer
Pitch This is the pitch of the dormer planes.
Distance to Dormer Centre/ Distance to Edge This is the distance along the eave to the center line or ridge of the dormer. This is the distance from the flashing point. Alternatively, this is the distance to the eave edge of the dormer and the width of the dormer measures from this edge. The function is a toggle button.
Setback from eave This is the distance from the eave to the face of the dormer.
Dormer Width This is the width of the dormer.
Length This is the length of the Single Slope dormer.
Side Overhang This is the eave overhang on the sides.
Front Overhang This is the overhang of the gable end.
Gap width This is the width of the gap that will be created from the face of the gable to the eave (or more exactly, to a distance from the eave based on the next value).
Gap Offset to Eave This is the distance from the eave to the gap (as above).
Dormer Material This is the material category that you want to apply to the dormer planes – Metal, Tile, Shingle, Low Slope etc
Eave Type This allows you to select the type of eave you want on your dormer, Fascia & Gutter, Gutter Only, Fascia Only or None.
For a barrel dormer, you get the following dialog box:


Type of dormer This is the style of the dormer which is one of Gable, Hip, Single Slope or Barrel.
Distance to Dormer Centre/ Distance to Edge This is the distance along the eave to the center line or ridge of the dormer. This is the distance from the flashing point. Alternatively, this is the distance to the eave edge of the dormer and the width of the dormer measures from this edge. The function is a toggle button.
Setback from eave This is the distance from the eave to the face of the dormer.
Dormer Width This is the width of the dormer at the base.
Height (Bulge) This is the Height of the barrel at the centre line.
Side Length This is the length of the straight projection of the dormer. This toggles to Height of Dormer Gutter if you want to fix the dormer by height.
Front Overhang This is the overhang of the gable end.
Gap Offset to Eave This is the distance from the eave to the gap (as above).
Dormer Material This is the material category that you want to apply to the dormer planes – Metal, Tile, Shingle, Low Slope etc
Gap width This is the width of the gap that will be created from the face of the gable to the eave (or more exactly, to a distance from the eave based on the next value).

Picture shows a good example of the Dormer Gap used to create “pigeon roosts”.
Offset from eave to gap This is the distance from the eave to the gap (as above).
Eave Type This allows you to select the type of eave you want on your dormer, Fascia & Gutter, Gutter Only, Fascia Only or None. When you click [OK], the dormer is inserted.
If you make a mistake and want to change the dormer, select Undo and start again.
When you draw a dormer, a hole is created in the affected plane. The width and projection of the dormer define the size of the hole. The amount of actual roof coverage is the same as the hole plus the amount of eave and gable overhang.
Be creative with dormers
You can be very creative with the settings for the Dormer function and depending on the settings, very different results will be achieved. Take the roof below, where we have added a dormer with the same apparent dimensions when viewed in plan.


Dormer with gable overhang and no ‘Gap’ and dormer with gable overhang and ‘Gap’ at eave.

Settings for Dormer with no ‘Gap’ – left side dormer.


Settings for Dormer with ‘Gap’ – right side dormer.

Extend Barge
Mod-Roof > Extend Barge This command allows barge lines to be moved or ‘stretched’ along the line of the eave. Once selected, the operator is prompted to select the barge line to extend, then the horizontal offset or extend distance. Click [OK] and the barge (rake) line is adjusted accordingly.

 A positive number is always out of the plane, and a negative number is always into the plane.
 Atrium
Mod-Roof > Atrium This command allows you to cut-out a portion of the roof along an eave creating an atrium. You can also create a drop down as well.
When you select this command, you are prompted to locate an eave line you want to modify. After that the Atrium defaults dialog box is displayed allowing you set parameters for the atrium.

Distance along eave
This is the distance along the eave that the atrium cut-out will start. It is measured along the eave, from the end closer to where you selected the eave. For reference, that end begins to flash.
Atrium width
This is the width of the atrium cut-out.
Atrium depth
This is the depth of the cut-out measured horizontally. If you enter a negative number, the atrium extends outward forming an overhang.
This diagram shows an atrium with a positive depth:

BEFORE AFTER
This diagram shows a negative depth:

BEFORE AFTER
 Drop-Eave
This command allows you to drop the eave along the full length of a plane edge, based on a horizontal offset.

This is like the Atrium command (above), but assumes the full length of the eave.
After you select the command, you are prompted to locate the eave you want to drop. Then you enter the horizontal offset you want the eave to move. Based on that offset as well as the pitch of the plane, the eave is projected in the line of the plane, the horizontal amount you just entered. The net effect therefore, is to drop the eave down in the plane of the roof, ie at the same pitch.

BEFORE AFTER
![]() Note: If you want to drop the eave down by a specific amount, you would then enter dh/tan(pitch) in the dialog box, where dh is the amount you want to drop the eave by, and pitch is the pitch of the roof plane in degrees.
Note: If you want to drop the eave down by a specific amount, you would then enter dh/tan(pitch) in the dialog box, where dh is the amount you want to drop the eave by, and pitch is the pitch of the roof plane in degrees.
 Change Eave Height
Mod-Roof > Change Eave Height This command allows the operator to select sections of roof or a whole roof to change the eave height relative to the ground level, assumed to be zero. After selecting the option, the new eave height dialog is displayed. Input the new eave height and click [OK]. The selected planes are moved in the vertical plane to the new height.


Valley/Hip Gable
Mod-Roof > Valley/Hip Gable This command inserts a gable at the base of a valley or a hip line. In effect, it automatically connects a gable dormer into the corner of a roof. You may also create flat roof plane areas to the apex of a roof (refer picture below).
After you select the command, you are prompted to select a valley line or a hip line. If the base of the valley/hip is connected to 2 eave lines then we can proceed. If there aren’t two eave lines at the base then the command terminates with an error message.
Then, the Valley gable defaults dialog box is displayed. This allows you to set the parameters for the valley/hip gable.

Distance along each eave
This is the distance along each eave. In essence this value defines the width of the gable.
Pitch
This is the pitch of the two gable planes.
Extension
This is the length of straight from the intersection with the eave to the actual gable.
The two planes adjacent to the initial valley or hip line you selected are modified to accommodate the new gable roof.
The following diagrams show the difference of inserting a valley gable on a hip and a valley.
(Selecting a hip)

BEFORE AFTER
(Selecting a valley)

BEFORE AFTER
Inserting the Hip gable with no extension constructs the geometry shown below.


Click the Gable button and you are presented with a further option – to generate a flat plane across the hip and all the way up to the ridge apex or to a known pitch.


Flat plane all the way to the apex, on a hip and on a valley. The pitch is determined by the required geometry.

The flat plane may also be inserted at a known pitch determined by the designer of the roof.

A flat plane section at a known pitch, in this case 15° on a single storey roof.
(hence the designation 1 – 15.0 and 1 – 25.0 etc).

Flying Gable
Mod-Roof > Flying Gable This command inserts a gable along a hip line and modifies the relevant planes to suit.
When you select this command, you first select the eave, which also defines the plane you want to deal with. Then you select the hip. This is the line along which the gable is inserted. It could be inserted from its bottom corner to its apex.
After that, the Flying gable defaults dialog is displayed which allows you to define the position of the flying gable.

Distance of apron from eave
This is the horizontal distance from the eave to the face of the gable. If you enter 0, then it draws the gable at the base of the hip.
Distance of gable apex from top of hip
This is the horizontal distance from the top of the hip to where the valley of the new gable will intersect. If you enter 0, then this gable is wedged at the top of the hip.
The following diagrams show different qualities when inserting a flying gable.
The flying gable in this diagram is positioned along the hip:

BEFORE AFTER
In the next example, the flying gable spans the entire hip:

BEFORE AFTER
Here, the flying gable starts at the base of the hip and finishes along the hip:

BEFORE AFTER
And here, the flying gable starts along the hip and finishes at the top of the hip:

BEFORE AFTER
 Slice-Hip
Mod-Roof > Slice-Hip This command lets you lop off a portion of a hip end or a whole long side of a roof.
This situation may arise if the roof is to abut an adjoining property boundary or shared wall. After selecting the command, you are prompted to locate an eave line. Then, you enter a station. The station is the position at which you want to slice the hip in relation to the selected eave measured horizontally.

![]() Note: You can only slice a hip end which is defined as an eave that has a hip at each corner.
Note: You can only slice a hip end which is defined as an eave that has a hip at each corner.
By default, the two new raked flashing lines are assigned to be eave
![]() Remember: you can use the Tools > Cha-LineType command at any time to change one line type to another should you need more control over the flashing used on the new geometry.This first diagram shows the right hand hip has been sliced. You can see the similarity between this and the lay-back gable command.
Remember: you can use the Tools > Cha-LineType command at any time to change one line type to another should you need more control over the flashing used on the new geometry.This first diagram shows the right hand hip has been sliced. You can see the similarity between this and the lay-back gable command.

BEFORE AFTER
In this second diagram, the bottom plane is modified. Unlike the previous example, the lay-back gable command would not be able to accommodate this change.

BEFORE AFTER
 Project-Gable
Mod-Roof > Project-Gable This command lets you realign a gable end to match a specific alignment (eg a property boundary) or to project the gable into an existing roof plane to form a raised or lowered entry way arrangement (as shown in the examples below).
You would typically use this command to help join two roofs of different eave heights into one roof.
Assuming you have already drawn a gable roof and wish to realign the end to be other than square and you already have drawn a line defining the new alignment of the gable end.
After selecting the command, you then locate the ridge connected to the gable end. Then you select a menu item from the text menu. This is one of
2-Points In this case you want the alignment of the gable end to follow the two points you are about to digitise
Line In this case you want the alignment of the gable end to follow the line you are about to select.
Plane In this case you want the gable end to project into the plane (roof plane) you are about to select.
When you select the 2-Points or Line command option, you then select the 2-points or line respectively and the gable end is realigned to match.
If you select the Plane command option, then the gable end is projected along the ridge alignment to hit the target plane. Now, one of 5 things can occur in regards to automatically editing the target plane:
If the new roof is totally within the target plane, then a hole is punched to suit.
If the eave heights of the gable and the target plane are the same, then the eave of the target plane is cut back to suit and the new roof is accommodated.
If the gable eave is lower than the eave of the target plane, then you are prompted to enter a tuck under distance. This is the amount the eave of the gable roof is projected under the target plane. Normally you would enter a value equal to the eave offset so the eave runs into the wall. In this case, a lowered entry way is formed.
If the ridge of the gable roof is higher than the ridge of the target plane, then no automatic editing takes place.
If the ridge of the gable roof is lower than the eave of the target plane, then no automatic editing takes place.
This first example, shows you how a gable (or even a hip end) can be realigned. After selecting the ridge, then the 2-Points command option, you then digitise 2 points (d2 and d3). You can see how the end is affected.

In this example, you first select the ridge, then the Line command option. Then you select the line. You can see how the hip end is now realigned to the alignment of the line.

The following diagrams show what happens when you select the Plane command option
In this example, the gable to project fits within the roof plane. In this case a hole is automatically cut out in the target roof plane. You will also notice that the hatching for the roof planes has been turned off.
To select the roof plane, you then select the “tick mark”.

In isometric, you can see the hole in the target roof plane.

This example shows what happens when the eave height for both roofs is the same.

In isometric view, you can clearly see that the two eave heights intersect.

When the eave height for the gable roof is lower than the target roof, you are prompted for a “tuck under” distance.

You can clearly see in this diagram, the tuck under, which in most circumstances projects to a wall.

 Align-Planes
Mod-Roof > Align-Planes This command allows you to align two independent roof planes together to create the one roof plane. By clicking on this command you are prompted to select the plane you want to move and then the plane you want to align it to. With that done the following dialog box appears:

You then have three options of how to select the planes to move.
Align Selected Plane Only Only moves the originally selected plane to be aligned.
Select Planes to Move Allows you to manually select roof planes to align.
Align Plane and Remainder of Storey Aligns original plane and all other planes on selected story to be moved into alignment
Once you have chosen your method click [OK] and follow the additional prompts as required. This is a very powerful command that will allow you to create extremely complex roof shapes, one component at at time, as the following example shows.
Model the high set and low set parts of the roof as two separate roof shapes.

After using the Modify Roof > Cut-Out command to remove the area of low set roof under the high set roof, you have the roof geometry below.


Select the plane to use as a reference plane, in this example it would be the back plane of the high set roof.

Then select the plane to align with, in this case the back plane of the low set roof, and once confirmed, they will align automatically.
Once aligned, you may use Modify Roof > More… > Merge-Planes to combine the high set with the low set so that the roof plane is continuous from ridge to eave, as shown below.
 Merge-Planes
Mod-Roof > Merge-Planes This command forms one roof plane out of two roof planes that are in the same plane in space that is, coplanar.
After you select the command, you then select the two roof planes you wish to merge. As long as the two planes are parallel, coplanar and share a common edge either fully or partially, a new roof plane will be formed. If connected lines are collinear and are the same type and are connected to the same planes, those lines are merged also.
Consider the following diagrams where there are 2 gable roofs butted up to each other. You can see in the “before” image that the roof planes are separate planes. For a tile roof, this may not be an issue, but for a metal roof, you want the bottom plane to be continuous. Using the Merge-Planes command, you can select plane d1 and plane d2 and turn them into one plane. You can see the hatch pattern in the “after” image is continuous.

The isometric image below, gives you a better idea as to what the roof is doing.

 Intersect-Planes
Mod-Roof > Intersect-Planes This command intersects and divides roof planes in the model and deletes those parts of planes which are below other roof planes.
To use the command, first draw the two or more roofs in full. They can be at the same or different eave heights and be of different covering materials. Then you select the command. After responding to a prompt to continue, the command then proceeds to intersect, divide and delete roof parts.
This command is most useful if you have a spire at the corner of a hip roof as in the following before and after diagrams.


 Link-Planes
Mod-Roof > Link-Planes This command resolves the boundary of two planes so that duplicate, coincident and overlapping lines are removed, and the most appropriate line type inserted.
After selecting the first plane, you then select the second plane. The planes are checked to see if they share a common boundary. If so, then duplicate lines along that boundary are resolved to having a single line – for example, two apron lines might become one ridge line.
This function works on walls as well as roof planes.

Cut-Out
Mod-Roof > Cut-Out (multiple planes) This command allows you to cut out holes and parts of existing roof planes.
You would commonly use this to cut out the second storey shape from the first storey roof. You can however use this command at any time to cut out sections of roof planes.
The Cut-Out defaults dialog is first displayed, from which you set the method of defining the cut-out shape and how you want to select the plane to cut-out.

You can define the cut-out area as follows:
Digitising the Cut-out Allows you to digitise around the required outline, normally by “Snapping” to existing wall outline.
Tracking the Cut-out Allows you to track around the required cut-out shape.
Auto-Tracking the Cut-out Will only work if a closed polygon or series of connecting lines exist as defined around existing line work, e.g. second storey wall outline. By selecting the first line of the required outline, the outline is automatically generated around remainder of closed outline.
Rectangular Area allows for the automatic specification of a rectangular cut-out shape of a given area. Once the user has entered the required area, they can then specify whether the rectangular shape area should be calculated on the roof pitch or the flat.

Once [OK] is selected, the user then simply drags the rectangle shape over the required roof plane and the rectangle orients itself on that roof plane based on the roof pitch. Function keys F1 to F4 can be used to make the rectangle wider or higher, depending on the requirements.
This function is going to be of considerable benefit to solar tile specifiers who can calculate an area of a roof to place solar tiles within and have the area maintained and changed to Shingle or Shake plane type so that solar tiles can be estimated at the same time as normal tiles.
You can select the roof planes as follows:

Using Visible Roof Planes
Will automatically select and cut out any visible roof plane within the cut-out boundary.
Selecting the Roof Planes to Cut-out
This option allows you to manually select the roof planes to cut out.
Note that only the planes within the cut-out boundary will be cut-out.
Selecting the Storey to Cut-out
This option allows you to select the specific storey(s) to be cut out during the actual ‘cut out’ phase of the process from a list in the dialog box (as shown here).
If you set the command to ‘Select the visible roof planes”, you can use Tools > Set-Display to change the screen display (eg turn off second storey roof and first storey walls), so only the required roof planes are displayed, that is, the ones that will be cut-out.
You can choose what you want to happen to the new roof planes within the cut-out boundary. That is, you can choose to delete them to create the cut-out, or you can choose to keep them. You would keep them if they were useful in forming new roof geometry.
After you select click [OK], you then digitise, track or auto-track around the cut-out shape. After you close the outline, you then need to confirm that you want the visible roof planes cut-out. Select the planes or storey(s) to cut. When you do, then all the selected roof planes are tested against the cut-out shape. The parts of the roof planes within the cut-out area are deleted. This diagram shows a complex hip roof with the cut-out shape drawn dotted. You can see in the after result that the line work (and roof planes) have been clipped to the cut out shape.

You can see in this isometric view how the cut out shape tracks along the roof line .

![]()
Note: You may also type U/D/R/L and an exact measurement in the required direction and use C to close the outline square while in this command.
Hip/Valley Dormer
(Pulldown only)
Hip/Valley Dormer This command allows the operator to add a dormer roof to a hip or valley line. Select the hip or valley line to add the dormer roof to, input the appropriate values in the fields on the dialog box and [OK]. The dormer is then constructed automatically.
Remeber, if you make a mistake, simply select [Undo] and try again.


Dormer roof on a hip and a dormer on a valley
The Roof Type to Insert button is a toggle that provides for an option to install a flat plane from the eave at a known pitch or to the apex.
Lay-Back

Mod-Roof > Lay-Back (a.k.a Gambrel)
You can apply lay back gable on a hip end or a gable end. You need to know the horizontal distance from the base of the hip to the cranking line as well as the pitch of the new plane.
After you select the command, you are prompted to locate the ridge at the hip end. You will then notice a flashing line at the base of the hip, which gives you a reference to measure from.
Also, the Lay back defaults dialog is displayed which allows you to set the lay back parameters.

Distance of crank from base of hip This is the distance from the flashing line to the cranking line. If the end is a gable, then it’s the distance from the base of the existing gable to the next apex along the ridge.
Pitch of the new plane This is the pitch of the new plane.

or Lay-Back on a hip would look like this:

Highlight
Mod-Roof > Highlight This command draws a highlight plane along a ridge as well as offside plane if you wish. It also modifies the offside roof plane by cutting a hole.

After selecting the command, you then click on the ridge you want to modify. Since each ridge can be connected to 2 planes, you are then prompted to determine which plane to extend the highlight plane from. You do this by clicking yes or no to the message dialog box which appears.
This message asks you “Do you want to extend from this plane?” and flashes the boundary of the plane for reference. If you want to extend from the offside plane, then click No.
After you have done that, the Highlight plane defaults dialog box is displayed allowing you to set parameters for the highlight window.

Distance Along Ridge This is the distance the highlight window will start from the end of the ridge you selected. For you reference, that particular end begins to flash.
Highlight Width This is the width of the highlight window
Highlight Depth This is the depth of the highlight plane
Side Overhang This is the amount the edges of the highlight plane will overhang the resultant hole. If you enter zero (0), the edge of the highlight plane matches the resultant hole.
Gable Overhang This is the amount the front of the highlight plane will overhang the hole
Offside Plane Depth This is the depth of the offside plane. If you set this value to zero, there will be no offside plane.
Pitch Offside Plane This is the pitch of the offside plane. The default value is that of the offside roof plane.
Once you click [OK], the highlight plane is drawn together with the offside plane (if you want one) as well as a hole in the offside roof plane.
![]() Note: If you don’t want a hole to be cut, then set the sum of the highlight depth and the offside plane depth to be the same as the verge overhang ie if (highlight depth + offside plane depth = verge overhang) then no hole is cut.
Note: If you don’t want a hole to be cut, then set the sum of the highlight depth and the offside plane depth to be the same as the verge overhang ie if (highlight depth + offside plane depth = verge overhang) then no hole is cut.
The following diagrams show highlight windows without an offside panel, then with an offside panel.

Here you can see the highlight panel in isometric.

This highlight window has an offside panel.

Here is a highlight window with an offside panel in isometric view. You can see the ridge in the highlight roof section as well as the hole, automatically created.
Ship’s Gable
Mod-Roof > Ship’s Gable This function effectively extends the ridge line of the gable end of a roof by an operator specified amount to create the ‘sloping’ gable as shown below in a single click of the mouse.


Change Gable Overhang
(Pulldown Menu)
Mod-Roof > Change Gable O’hang This command changes the verge or overhang of an existing gable end. In effect, you can project a gable end along a ridge so the ridge becomes longer or shorter with the effect that the overhang is wider or narrower.
After selecting the command, you are prompted to locate the ridge at the gable end. Then you enter an amount to add or subtract to the overhang. After you enter an amount, the ridge is lengthened or shortened depending on the sign of the value you enter.
Cricket
Mod-Roof > Cricket This command provides for an easy method of adding ‘crickets’ behind opening in the roof such as chimneys etc.

Typically a hole or fixture would exist on the roof model already and to insert the cricket, select the line where you want the cricket constructed.
You are then prompted for the length of the cricket, defaulting to the length of the line you selected,

then the pitch of the cricket,

and then whether the roof plane beneath the cricket needs to be removed or not.

The cricket is then inserted on the roof similar to that shown below:

Before

After
Cut Line
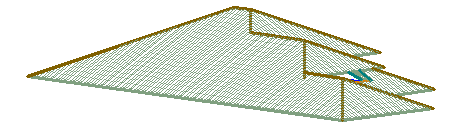
The Cut Line button allows you to determine the location of the intersection of two planes. This is often very useful when constructing complex roof shapes one plane at a time and they need to be trimmed back to where the planes intersect. A line is automatically inserted at the line of intersection.

Cut Plane
The Cut Plane button allows you to determine the location of the intersection of two planes. This is often very useful when constructing complex roof shapes one plane at a time and they need to be trimmed back to where the planes intersect. A line is automatically inserted at the line of intersection.

Top view
Two roof planes intersecting, and the orange line is where they intersect and calculated by the software using this function.

Right side view
Attach-Planes
(Pulldown Menu)
This command allows you attach a new roof plane to an existing roof plane. The new roof plane may have a different pitch and eave height.

After selecting the command, you then select a line. The line must be horizontal, and attached to one roof plane. Otherwise you will get an error message. You then enter the roof type, storey, pitch and eave height for the new panel
When you click [OK], the new roof plane is inserted. The direction of the plane is a function of the pitch (positive or negative) and the eave height (above or below the height of the line you selected.
To have the new plane go down and away from the current plane, enter a negative pitch and an eave height lower than the selected line. To have the new plane go up and away, enter a positive pitch and an eave height higher than the selected line.
Here you see the new plane attached to the line d1. Notice that the new plane spans the entire length of the selected line.

Before

After

Occasionally, you are required to insert a new roof plane, but you don’t know the eave height, you only know the depth of the plane from the eave you’re attaching the new plane to. Select the Eave Height button and that changes to Plane Depth.

Bay-Window
The Bay-Window command lets you insert a bay window onto an existing roof. After selecting the eave line onto which the bay window is placed, the Bay Window Dialog box is displayed.

Distance along eave
This is the distance from the end of the selected eave to the start of the bay window.
Out step length
This is the length of the initial projection away from the eave.
Face length
This is the length of the face parallel to the eave.
Skew length
This is the length of the side connecting the step with the face.
Angle
This is the angle which the skew lines are to the eave (0-90 degrees).
Pitch
This is the pitch of the face plane. The side planes are then calculated to suit.
Zero length ridge
This is either Yes or No. If No, then the pitch of the face plane is calculated to intersect the main roof plane such that no ridge is created.
Merge Edges
(Pulldown Menu)
This command allows the operator to merge two plane edges created by the Drop-Eave function. Take the example below:

Now select the command, Modify Roof > Merge Edges and the select each rake line to merge and the roof is re-constructed to create a correct corner.

Insert Plane
(Ins-Plane) The operator is prompted to select a line forming the boundary of a single roof plane. The software then tracks the line through adjoining lines to find connected lines in the same plane (ie flat) until it achieves a closed loop. In tracing the closed loop, if there are multiple intersecting lines at the next corner the software will automatically prompt you for the next line with a question “Use this entity?” and the lines will flash. Confirm the required line by selecting Yes.
If it does not find multiple intersections, then it will automatically continue around the outline to form a closed loop of all connected lines. The plane is then inserted. [Continue] this process for all other roof planes until the roof is complete.
Delete Hole
(Del-Plane) This function allows you to remove a hole created in a plane, without having to re-create the plane. For example, this situation might exist if you have deleted a dormer, instead of using Undo to remove it. If you have done a lot of work after the insertion of the dormer, then you would not want to use the Undo function.

Before you delete the Dormer, and after you delete the dormer, a hole is left.

Simply select one of the perimter lines, and the plane is re-built without the hole.
- Zoom
- Zones
- Your Company Details
- Wizards
- Wall Flashing
- Wall Allowances
- View
- Verify Entity
- Verandah/Porch
- Valley/Hip-Gable
- Underlay
- Track-Walls
- Track-Edge
- Tiles+
- Tiles
- Tile Colours
- Tapered (Metal) Panels
- Tally-Cutlist of Wall Panels
- Tally Quantities
- Tally Panels
- Tally Blocks
- System Preferences
- Supply Only
- Supply and Install
- Stage Manager
- Smartlines
- Show/Hide Walls/Direction & Tally Wall Quantities
- Show/Hide Planes
- Show Pitches
- Show Line Type
- Ship’s Gable
- Shingles/Shakes
- Set Panels
- Set Display
- Server Licensing
- Select Tile +
- Select Tile
- Select Siding Material
- Select Metal
- Select Membrane
- Section
- Scale/Rotate Image
- Rotate in 2D Axis
- Roof Outline Template
- Roof Defaults
- Report Templates – MS Word
- Report Templates – CAD
- Recover Outline
- Project Wall
- Project Gable
- Plot
- People
- Pay Rates
- Panel Allowances
- Orientation