Fall Protection
 Fall-Protection
The fall protection option allows custom application of fall barriers to the perimeter of the roof or indeed any other lines. To apply the fall protection, it must first be selected in either the Cover > Select-Tile and Cover > Select-Metal commands. Here you can nominate which additional lines will have fall protection and which lines where it may not be required.
To Select it for a job go into the metal or tile selection box and click on the arrow at the end of the Fall Protection field. A drop down box will appear and the fall protection that you just created will be there. Select it, and you will have fall protection added to your job on all eaves that are above the FP Height set at that time.
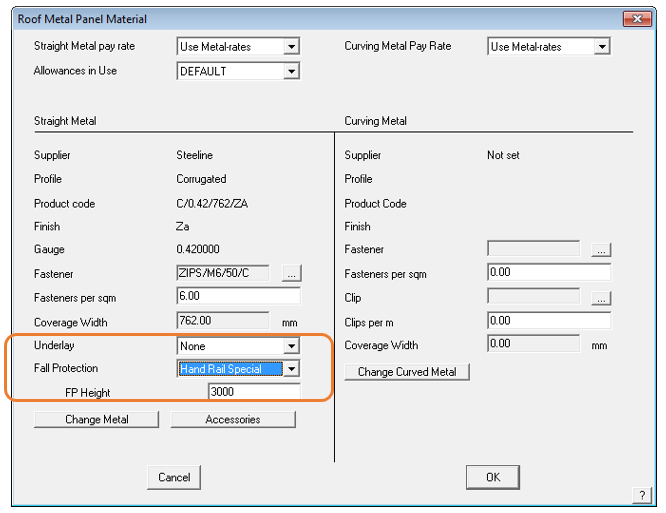
For example with metal roofing panels selected, the following dialog box shows the panel and the critical setting is seen – FP Height.
 If you select a Fall Protection item here, and then set the FP Height (height of any perimeter line above the construction plane (CPL), then the selected Fall protection Item is added to all edges.
If you need greater discretion or a variety of fall protection items applied to the roof model, because of building codes or practicality, then you should not select it here but under Cover > Fall Protection. This provides for you to first of all select any fall protection type to any line in the model and have multiple types of fall protection items on the job.
You may select multiple types of fall protection on the same job.
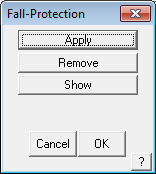
Apply
This command lets you apply fall protection to all lines that you select. Once you select a fall protection you then select all the lines you want it applied to. Select it, and you will have fall protection added to your job on all eaves that are above the FP Height set at that time.
Remove
This command lets you select lines to which fall protection has been applied, and removes it.
Show
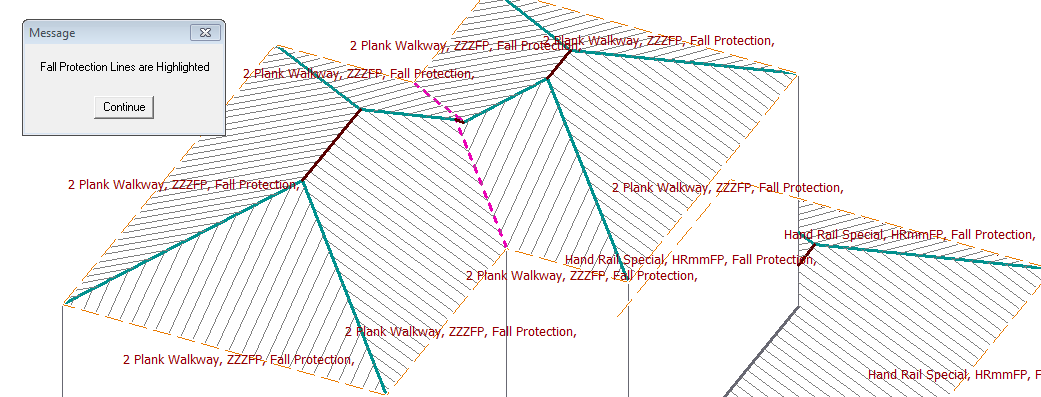
This command will highlight all lines that have fall protection material applied to them.
Comments are closed.