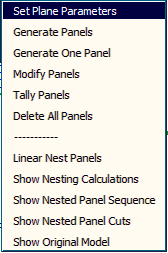
Set Panels
 Set Panels
These are a series of commands that allow you to set up the lay of the panels on the roof and the panel offsets according to settings defined in the Allowances.

Ins-Lap-Dir
This command lets you draw an arrow on the model which defines the lap direction for the Gen-Panels-One command and the Gen-Panels-All command. If not selected, the software automatically determines the lap direction with the priority being laying away from a gable end on the roof.
The lap direction defines the overlap side of the sheet, and consequently will alter how the panel sequence is generated in the Linear-Nesting command.
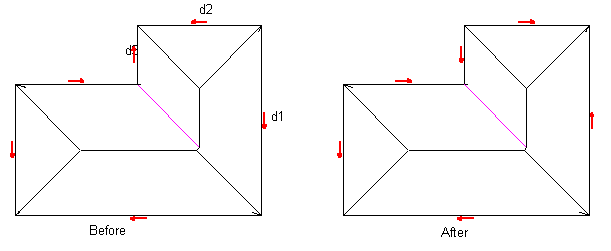
The following diagram shows the insertion of a single lap direction:
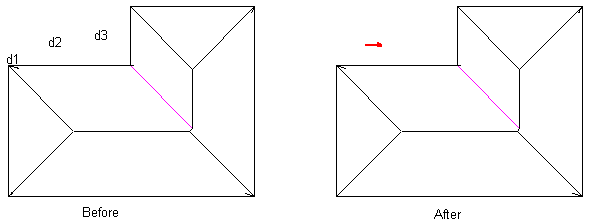
You will see that d3 defines the direction of the arrow as left or right (compared to d2).
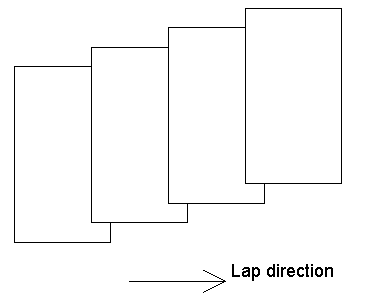
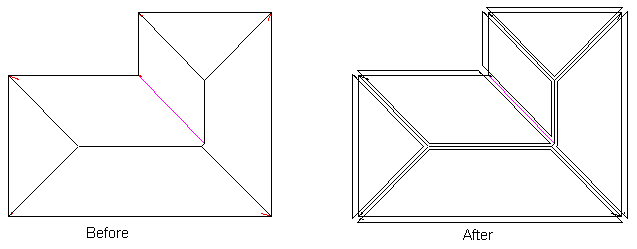
The following diagram shows you the effect of the lap direction with respect to the underlap.
For a good result using linear nesting, it is necessary that consecutive roof planes have opposite lap directions.
Ins-Lap-Dir-Auto
This command automatically draws lap direction arrows on the model which defines the lap direction for the Gen-Panels-One command and the Gen-Panels-All command. In effect, the lap direction defines the underlap side of each panel.
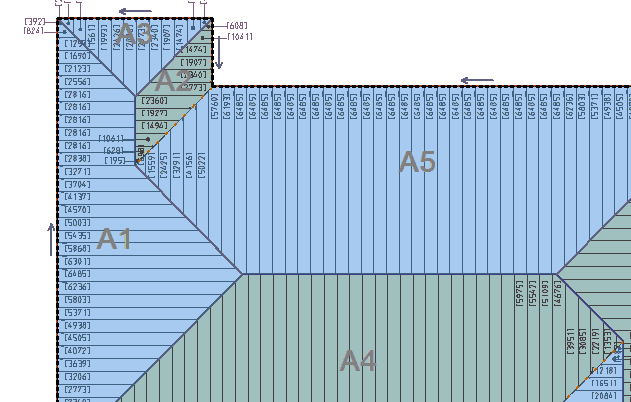
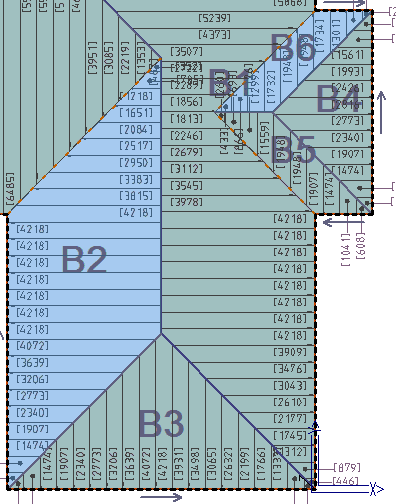
The following diagram shows the lap direction arrows automatically inserted onto the model
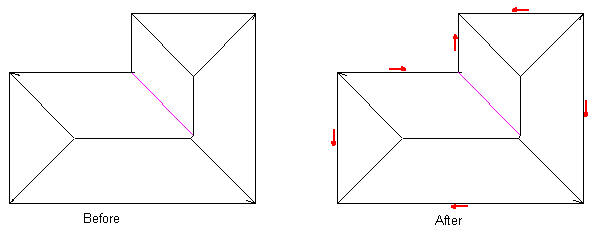
You will notice on the above diagram, that some optimisation of lap direction occurs. You will see at each hip end, that there is one lap direction going away and one going into the hip. Also, around each hip end, the directions are not the same in subsequent sides. However, you will notice that the directions are the same for the bottom and right hand roof planes. You can change this using the next command.
Swap-Lap-Dir
This command lets you swap the direction of a lap arrow if you want to change the direction to account for the visual appeal of the roof or perhaps to account for prevailing weather.
The following diagram shows 3 lap directions changed. As a rule of thumb you get a better nesting result with linear nesting if the lap direction on consecutive roof planes is opposite.
Swap-Lap-Dir-Win
This command does the same as the previous command, but lets you select the lap direction arrows using a window or by selecting more than one at a time.
Del-Lap-Dir
This command lets you delete a lap direction arrow.
Offset roof
This command automatically creates an off-set roof given the clearance values and the batten thickness you set in the Estimate Allowances dialog box. This defines the geometry of the panels as distinct from the geometry of the roof, which are not usually the same. When roof panels/sheets are next generated using Gen-Panels, they are generated to this geometry, not the roof geometry.
Change-Offset
This command allows you to manually change the offset on each line at a time. By selecting on the roof plane to change the offset on, you are prompted with the following dialog box.
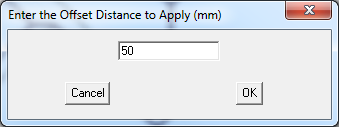
Simply enter in the new offset and click [OK]. The new offset will then be applied to that line. This helps to make minor adjustments to the offset plane which effectively adjusts the sheet lengths following verification of field measurements of the roof to be covered.
Del-Offset
This command deletes the offset roof planes created by Offset-Roof.
Set-Section
The Set Section function allows you to name a group of planes that will be tallied and drawn together, thus simplifying ordering, delivery and installation, especially on very large projects.

Then when you you set the sequence, it is clear which area is associated with what and the sequence can be set.
Set-Sequence
This command lets you sequence the numbering of the roof planes for the Tally-Panels and Linear-Nesting commands. You do not have to define the sequence as Roof Wizard will do it for you. Here you have the opportunity to change the sequence. When you select Set-Sequence, the sequence numbers of each roof plane are displayed.
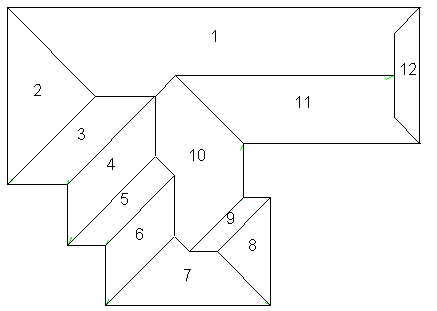
The initial numbering of the roof planes is based on the order of the roof planes in the Roof Wizard database. In the above drawing, you may want plane 11 to be number 1, then go clockwise around the roof.
To change the sequence, you first click 11. This then becomes 1 and what was 1 is now 11. Then you click 10. This becomes 2, and what was 2 now becomes 10. You then proceed around the roof in the order you wish the roof planes to be covered.
To finish assigning the sequence, click the abort button. The sequence numbers then disappear. To see the sequence again, click Set-Sequence.
The Tally-Panels command and the Linear-nesting command use this sequence to number the panels on each of the roof planes. This is also used in producing the drawing called the section Report. This shows each area of roof panels as a separate drawing. (Refer to report templates and ###RoofSectionDRawing).
Comments are closed.