Measure Pitch from Image
Measure Pitch from Image
This Measure from Image pitch measure tool is an alternate to the pitch measure tool found under Construct Roof > Measure Pitch from image, typically used to measure the pitch of a street side view of a structure. It is really only applicable where you have a good quality “square-on” elevation or street view image. If you only have oblique images, you must use the Construct Roof > Measure Pitch version and that must be done before you start modelling your roof.
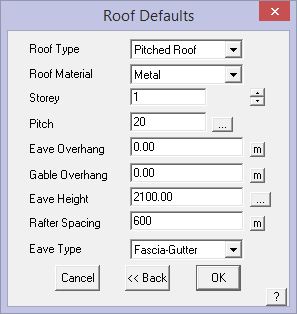
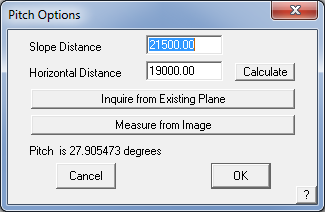
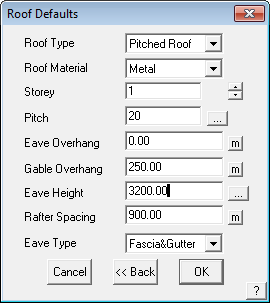
By selecting the button […] next to the Pitch field in the Roof Defaults dialog box, the dialog box below is displayed. Here you may determine the roof pitch using field measurements where the slope distance is the distance up and over the roof (that is ridge to eave length x 2) and the Horizontal Distance is the length between eave lines. Select Calculate and the roof pitch is determined by the software, select [OK] and the pitch is input into the pitch field.
If you are completing the quotation entirely from images such as Google® Maps and Google® Streetview, then you can determine the roof pitch from the Streetview image. (The image must be saved in the …\User folder so it is easy to find and this should be done ahead of time.)
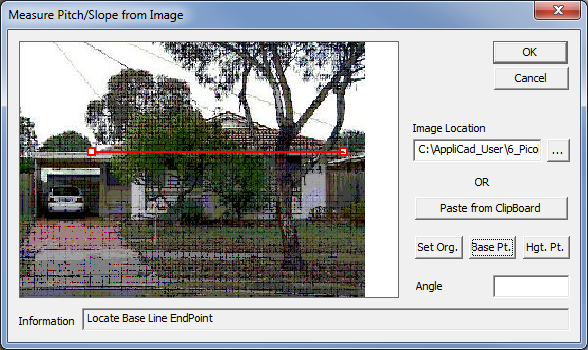
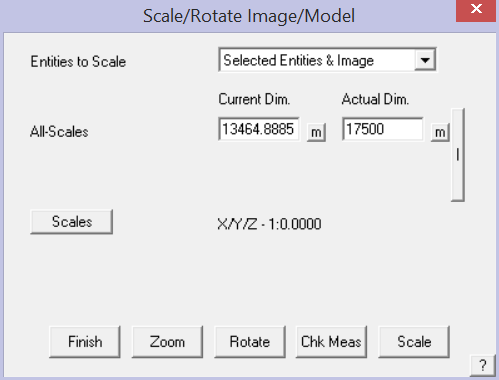
Select the button, Measure from Image. The following dialog box is displayed and waits for you to select an image from a specific location or from the Clipboard. Once selected or Pasted, select the Set Org. button to set the corner of the eave line – in this case, the right hand extreme of the eave. Then select the Base Pt (base point), and the line is drawn as shown below.
Follow the prompts in the Information field of this dialog box.
Next select the Hgt. Pt. (height point) button and select the point of the image nearest the ridge apex. The line is drawn and the angle of pitch is determined as shown below.
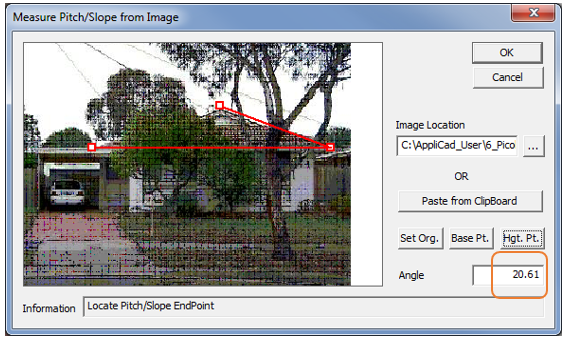
Select [OK] and the pitch as determined is input into the pitch field of the Roof Defaults dialog box. You might round it up or down to a whole number if required.
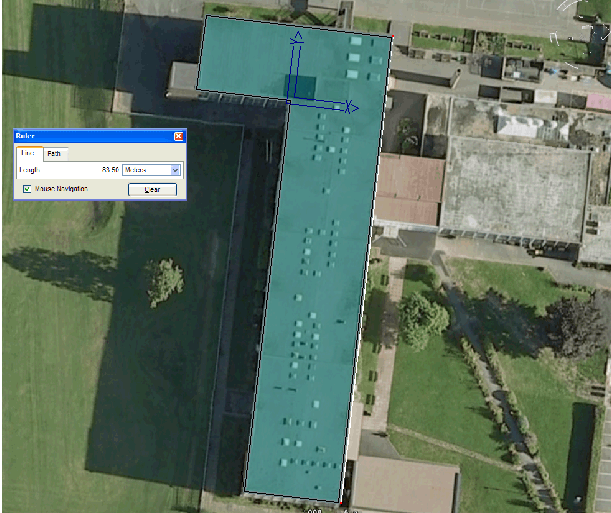
Digitise Aerial Image – Single Slope Roof
 The same process can be applied to aerial images. The three steps are: 1 Enable the image; 2 Scale the image and workspace; and 3 start digitising.
Select Enable Underlay and then paste from the clipboard or open a saved file.
Scale Model using the overall dimension extracted from the aerial image provider’s tools. The software tries to do everything orthoganally so to set the overall measurement across the widest part of the building, hold down the Control (Ctrl) key to measure off-grid.
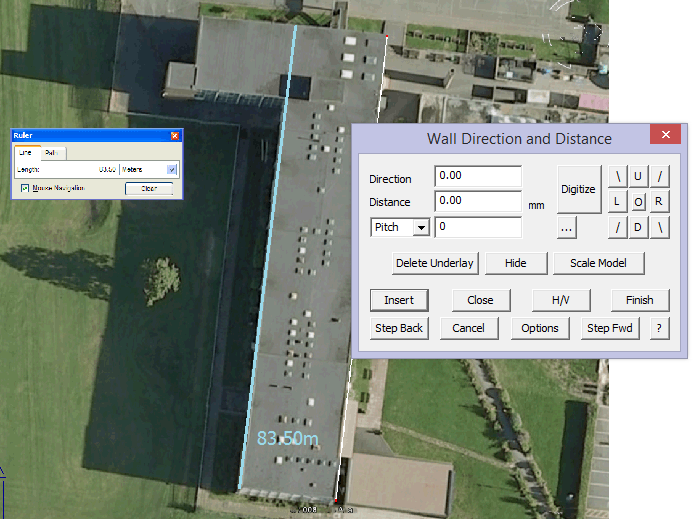
Digitise the first line, again holding the Ctrl key to insert the line off-grid; then right click [Cancel] and select [Close]. This brings up the Close Method dialog which provides for the option to re-align the digitise axes with the last digitised line. Select the function Align Axes with Last Line. The Construction Plane is re-aligned and you may continue digitising.

Digitise the perimeter and when you get to the penultimate corner, right click mouse ([Cancel]) and you will be prompted to close the outline; select Close Square. The Roof Defaults dialog is displayed and you set the Roof type to be Single Slope and the pitch as required. In this case it is zero.
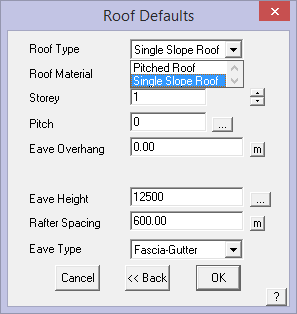
Select [OK] and you will be prompted for the pitching line. This roof is totally flat, so select [Continue]. And the job is complete. Notice the CPL icon is rotated and relocated. This occurred when we aligned the axes.
Comments are closed.