Group Menu – Move/Stretch/Copy/Delete
Group Menu
 Move
Move
These functions are permanently displayed in the Icon menu, usually on the left side of the workspace. Also available from the Pulldown Menu – Construct Roof > Move Entity(s). This command lets you move a selected roof. After selecting Move, you then select all the roof planes you want to copy. You can select the planes individually, or by digitizing a window around the roof.
Then you digitise the initial point and final point. These points define the vector along which the roof is moved. This command is useful when you want to simplify a complex roof into 2 or more roofs. You can then model up each separate roof part individually, then move them into place later.
There is one small exception to these descriptions – when using the Construct-Roof > Smartlines functions, the move, stretch, copy functions only work with lines as it speeds up the Smartlines execution for the user.
Consider the following diagram where the final roof is composed of 2 roofs.
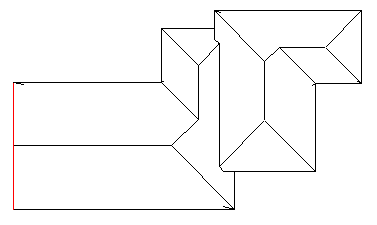
It would be easier to draw the roofs separately, then move the second roof into place afterwards. Then you would need to merge the roofs as necessary.
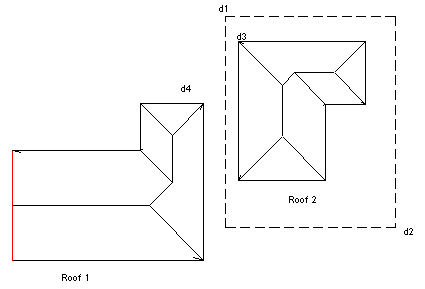
This diagram shows roof 2 after it has been moved.
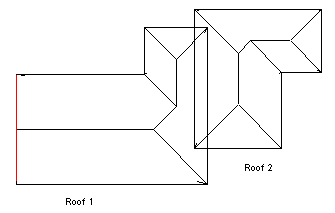
Then, it’s up to you how you need to merge the roofs. In this example, they have been merged using Modify Roof > Advanced > Intersect-Planes and that gave the result at the top of the page.
 Stretch
Also available from the Pulldown Menu – Construct Roof > Stretch Entity(s). This command lets you move selected points and lines and have the connected linework update to suit. This is unlike copying and moving where connected entities are ignored.
A good example is to stretch a hip end to make it longer.
In this example, the right hand hip end is stretched by 4000 units to the right. Notice that incremental coordinates are used to define the stretch vector.
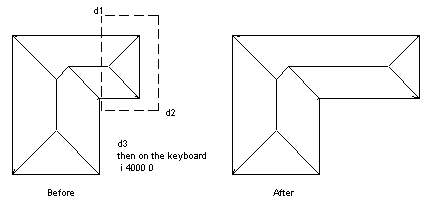
Note that using the stretch command may result in strange outcomes. Be careful to select just those entities that will stretch along a vector without changing the basic roof shape, and to define the stretch vector properly ie in the right axis. In the case above, the X axis was important.
 Copy
Copy
Also available from the Pulldown Menu – Construct Roof > Copy Entity(s) This command lets you copy a selected roof. After selecting Copy, you are then prompted for the number of copies. You then select all the roof planes you want to copy. You can select the planes individually, or by digitizing a window around the roof.
Then you digitise the initial point and final point. These points define the vector along which the roof is copied.
This is helpful when you have multiple roofs to quote on the one job, and need to make one or more copies. Also, you can select any entity rather than just roofs.
Consider that you want to copy this roof to a position to the right of the existing roof.
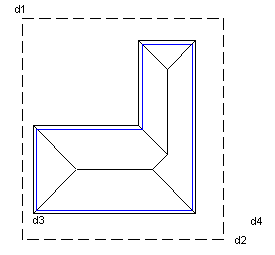
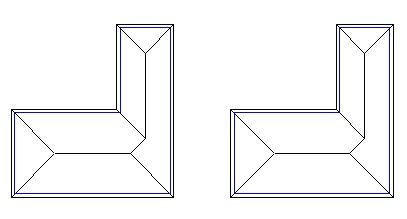
First, select the roof using a window (d1 and d2), then nominate the initial point (d3) then the final point (d4). You can see below the second copy created at the correct position
Instead of digitizing 2 points which define the vector to copy the roof, you could also do one of the following.
Absolute coordinates Here you can enter 2 coordinates at the keyboard
Locate initial point LOC>0 0 0
Locate final point LOC> 5000 0 0
or
Enter a vector Here you enter a single vector at the keyboard using the character “v”
Locate initial point LOC> v 5000 0 0
or
Incremental coordinates Here you digitise a start point, then enter an incremental coordinate using the character “I” (I for Incremental):
Locate initial point LOC> [digitise any point on screen]
Locate final point LOC> I 5000 0 0
In the 3 above examples, all will copy the selected entities 5000 units to the right (the positive x direction).
 Delete
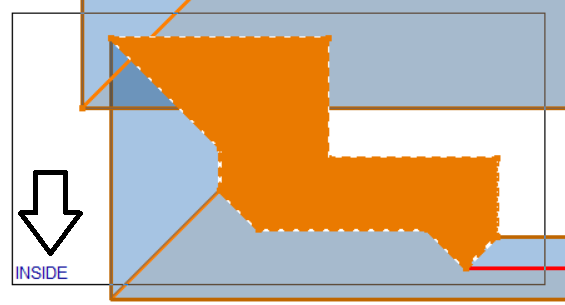
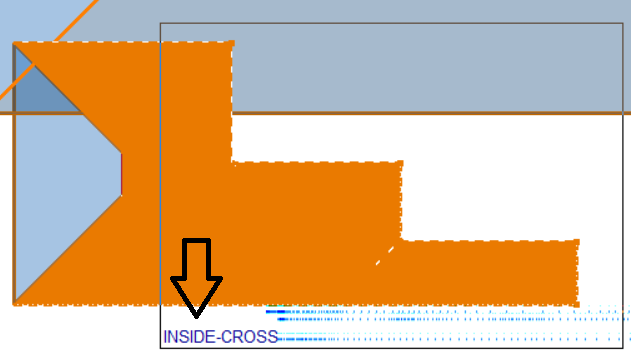
Also available from the Pulldown Menu – Construct Roof > Delete Entity(s) This command lets you delete a selected roof. After selecting Delete you then select all the roof planes you want to delete. You can select the planes individually, or by digitising a window around the roof entities you wish to delete. Selecting using the Window option has two modes – selecting top-left and dragging down only selects items fully contained in the select box, while selecting lower-right and dragging up picks up items that cross the boundaries of the select box. This is indicated in the corner of the select box:
Comments are closed.