Modify Offcuts/Tally Offcuts/Delete Offcuts
 Modify Offcuts
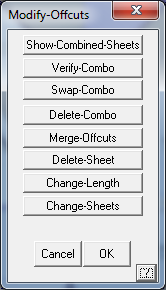 Modify Offcuts provides tools that permit viewing and liited changing the Off-cut Layout generated automatically.
Verify-Combo highlights the matched pair of triangular areas of panels that will make up a cut/off-cut area.
Delete-Combo deletes a combined cut/off-cut pair from the job.
Merge-Off-cuts merges a selected panel/sheet with an adjoining group of cut/off-cut triangular areas. The panel/sheets as shown below can be merged with the adjoining area.
Sht-12 can be merged with C11; S5 with O4 and S6 with O3 etc. around the entire job.
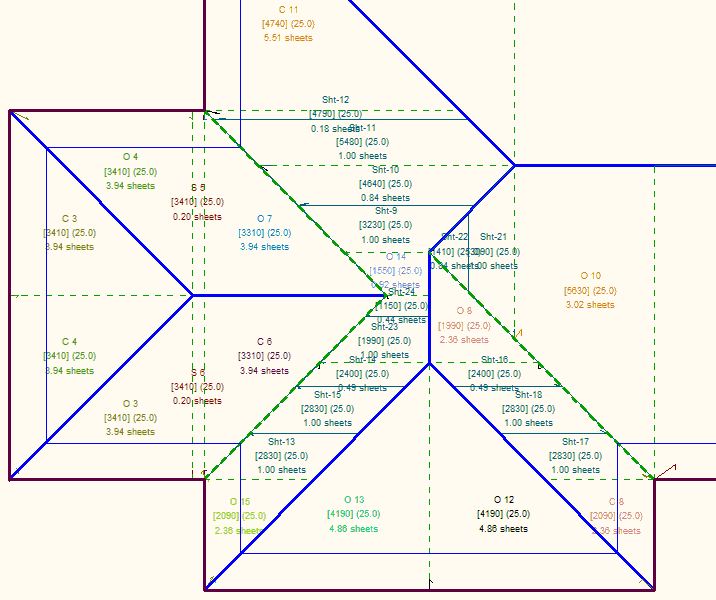
On this side of the roof, the following panels/sheets can be merged without effecting the job and reducing waste from off-cuts.

Removing the Sht-12 (0.18 of a sheet width) and merging it with C11 and this area goes from 5.51 of a sheet width to 5.69 of a sheet width – enough material to cover the job, without adding an extra panel/sheet.
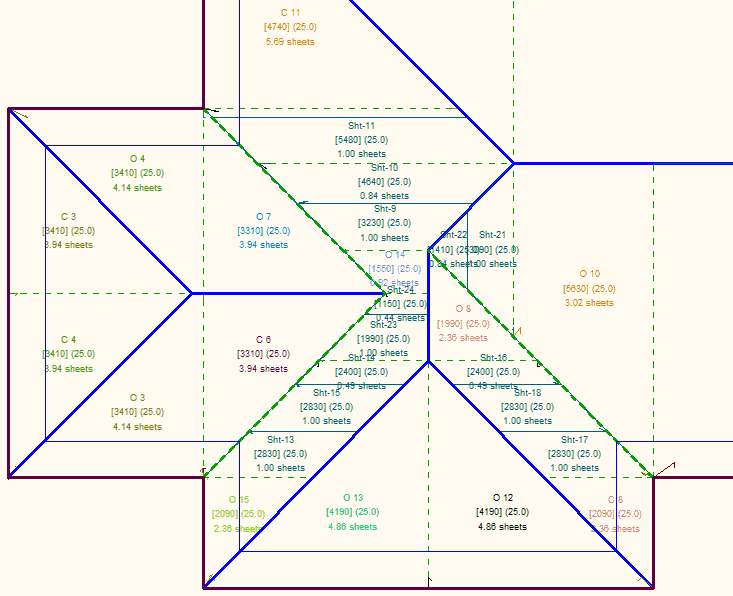
The installers can see at a glance, where all the material is to be installed.
Delete-Sheet allows the operator to delete an individual panel from the cut list. This would be done if it was clear that an off-cut strip from another area of roof could be used instead.
Change-Length allows the operator to change the length of a cut/off-cut combination.
Change-Sheets allows the operator to change the total number of sheets in the job by adding or subtracting from the sheet count.
 Tally Offcut Panels
This command generates the cut list for the optimized panels and reports total number of panels, and the total length of coil required, just like the previous methods. It must be run before a cut-list is created or costs can be determined under Reporting.
 Del-Offcuts
This command simply deletes the off-cut areas from the model.
![]()
Note for when you are setting up your report templates: Use the key text string ###SheetList to display the panel lengths in a table on the report.
If the text that annotates the panel areas appears to be too small on the Microsoft Word report, that is not a problem with the template, it will be the plot scale of the roof before you print. The trick is to set the plot scale so that the text is legible on screen, then generate the report.
Comments are closed.