Wall Flashing
 Wall Flashing
This command generates the flashings for the opening trims and corners of the walls.
When you select Flashing, the Wall Flashing dialog box is displayed.
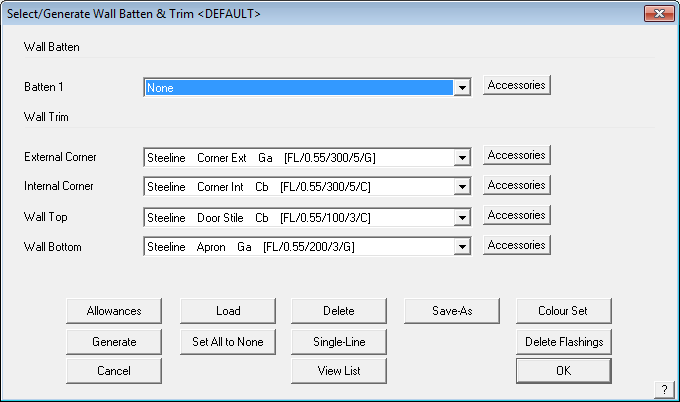
This dialog box shows you the trim material to be used on each of the line types created in the model of your walls. To change the type of trim, click on the relevant button. Selecting the Batten button brings up the list of batten materials available for that line style. In this example we have quite a few batten material options.
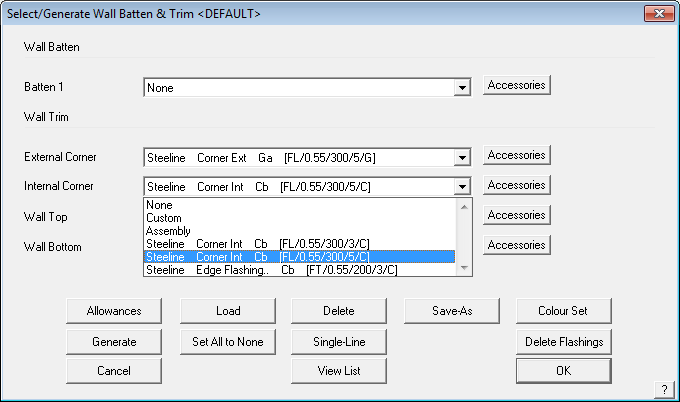
Here, you either select None, so that you don’t want any material on that line type; or Custom, a fabricated flashing profile, usually made in a press break to a custom specification; or a bought in regular flashing item usually fabricated in a roll-former. You may also select from a Flashing Assembly which is an assembly of flashing profiles such as used on parapet caps and box gutters. All these materials must first be defined using Set-Up > Flashing. Refer to this section of the Reference Manual for more details about defining and using your flashing materials.
Wall Battens
The wall batten button Batten has an Insert/Modify option. Selecting this button opens up the dialog box shown below and allows for comprehensive set up of your wall battens/purlins.
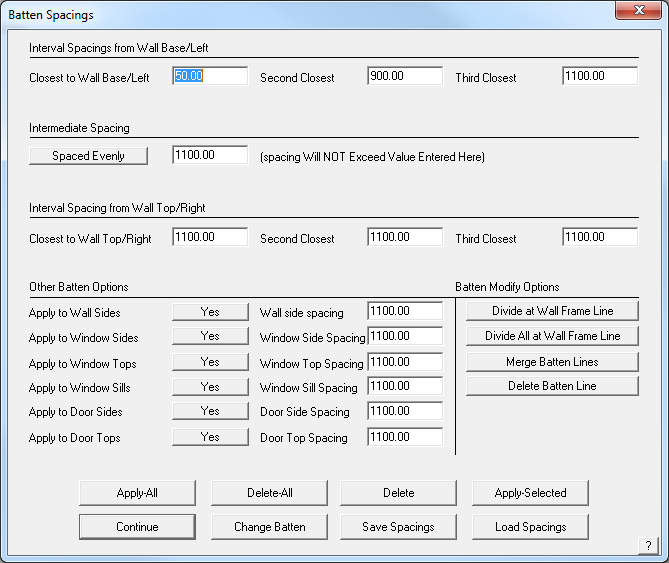
The operator can define the batten spacing and the program provides for the spacing to use near the top and bottom and left and right of the wall plane to suit the requirements of certain building codes, especially in cyclonic or hurricane prone areas.
The intermediate batten spacing may also be set. The options for the intermediate spacing, that is the batten spacing after the pre-set batten spacing, may be a fixed spacing of the specified amount or spaced evenly along the length of the wall up to a maximum spacing.
Notice that you can also specify additional battens around openings.
Many batten/purlin configurations require the battens/purlins to be split at a wall frame. This may be the case for a typical portal frame commercial structure. If the battens/purlins need to be split, use the Divide at Wall Frame Line option then the operator needs to indicate at which frame member the batten/purlins will be divided. Individual battens/purlins can be divided or all the battens/purlins on the wall plane using the Divide All at Wall Frame Line.
If a batten/purlin is incorrectly divided, then use the Merge Batten Line button. The Delete Batten Line completely removes the Batten/Purlin from the model.
Apply All Applies battens/purlins using the spacing definitions set.
Delete All Deletes all batten/purlins from the model.
Delete Deletes the battens as selected.
Apply Selected Applies battens to a wall using the current settings. Use this to modify batten spacing on a wall by wall basis.
[Continue] Takes the operator back to the Flashing dialog to continue setting up wall trim.
Change Batten Changes to a different batten material.
Save Spacings Saves the current settings. Use this to set up different spacing settings for various wall systems.
Load Spacings Read into the current job, spacing settings from a predefined set.
Wall Flashing Allowances
Clicking Allowance, will display the allowances dialog box.
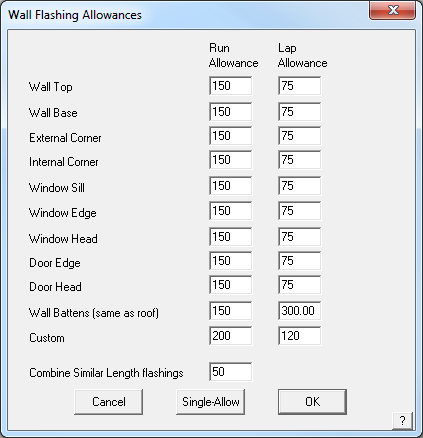
The run allowance is the length added to each line length to ensure that the installers have enough material. The lap allowance is the length added to allow for lap joins in the material. The run allowances and lap allowances will be added to each run to compute the cutting list.
Generate Wall Flashings
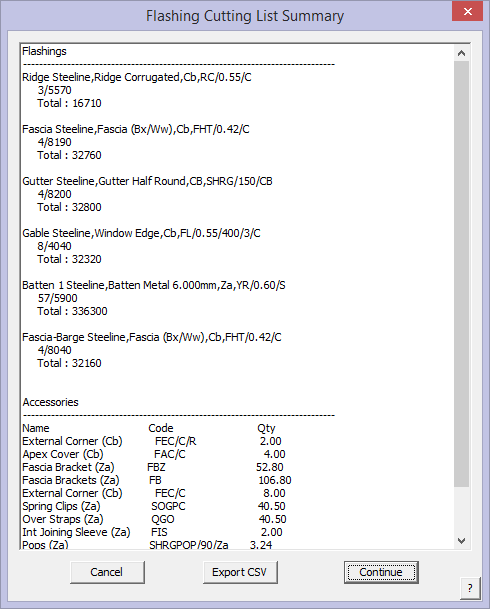
To generate the cutting list of wall flashings, including the battens and all associated accessory items required to install the trim package, click Generate. After the software reviews all the materials and accessories, and generates the cutting list, you will see the list similar to that below. If a roof has been quoted as well, you will get roof trim as well as wall trim in the list.
Selecting the ExportCSV button will export the information displayed in the list to a comma separated values file (a text file) of the flashing cutting list. This may be used by other systems or imported into your favourite spreadsheet program.
Selecting the Accessories button brings up the complete list of accessory items for this set of trim including clips, brackets, screws etc.
Selecting View-List will simply display the cutting list you generated earlier.
The Delete button, will delete the cutting list so it is no longer costed.
Single-Line will let you assign a separate flashing to a line you select.
Set-As-default, will set the current configuration as the default set of flashings you want to use.
Set-Colour sets the colour for painted flashings to be the same.
Comments are closed.