Supply Only
 Reporting > Supply-Only
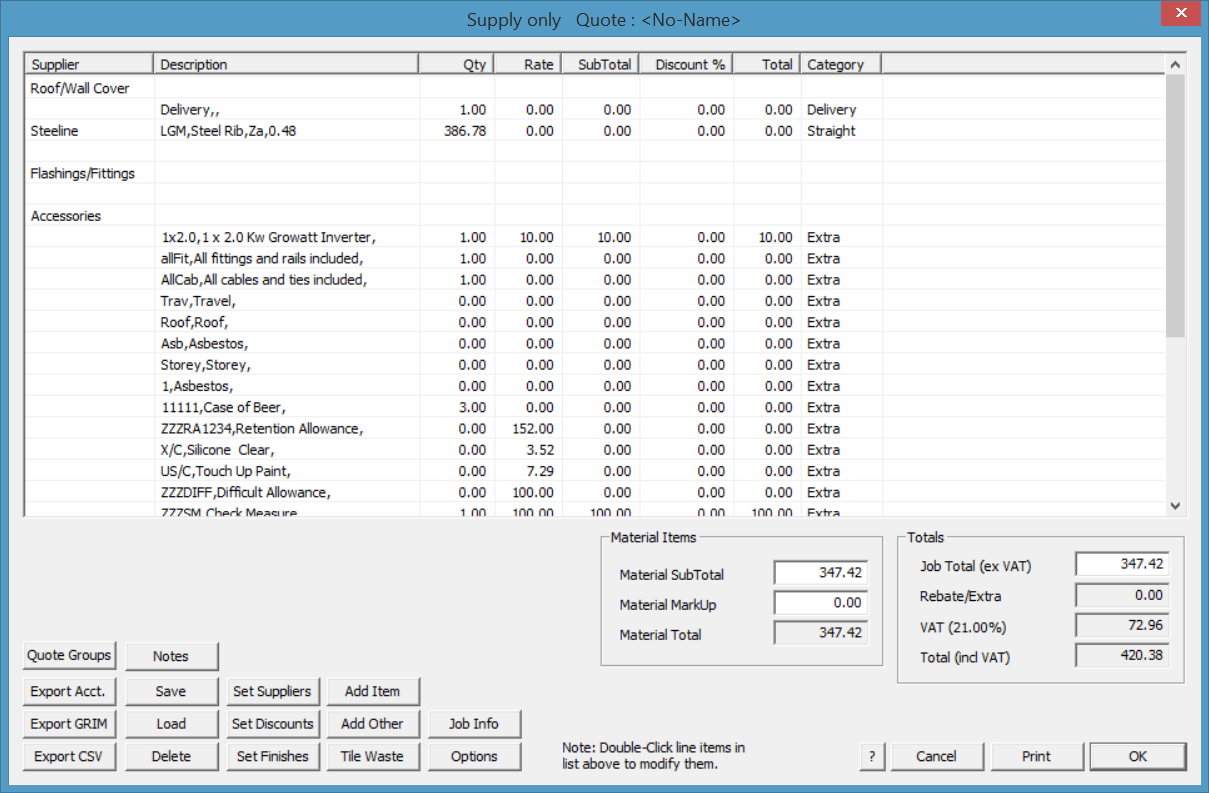
When you select Supply-Only, all the materials are tallied, sorted and displayed on the Supply-Only dialog box. The title on the dialog box describes the name of the current quote as well as what page is displayed.
The Reporting for the job takes account of stages defined using Stage Manager such as first storey, second storey or roof material and trim. Please refer to the detailed description of Stage Manager to know how this is applied.
Along the top you can see columns called Category, Supplier, Description, Qty, Rate, Subtotal, Discount and Total. Each row represents a single material item ranging from the roof cover material to gutter brackets.
Supplier This is the name of the supplier of the item
Description This is the description which combines the description of the item and finish
Qty This is the quantity of each item derived from the estimate process. The unit for the quantity is described in the above table.
Rate This is the rate per item
Subtotal This is the sum of the quantity and rate
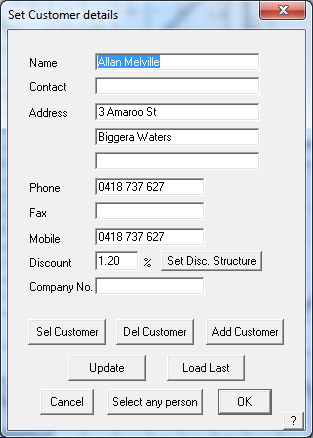
Discount This is the discount percentage you want to apply for that line item. The default value is the discount associated with the selected customer. If the value is set to a negative number, a mark-up is applied. The Discount may be pre-set for each customer – set this in the Job Info > Customer section – as shown here.
Total This is the total for this line item after applying the discount.
Below the Total column is the Job total field which is the total for the job, not just for the page you are looking at, if there are multiple pages.
The buttons at the foot of the page are:
Category – this value is simply a shorthand description of the type of item described in the following table.
| Category Name | Type of material | Unit |
| Straight | Straight metal roof material | M²/ft² |
| Curved | Curved metal roof material | M²/ft² |
| Ridge | A ridge flashing | M/ft |
| Valley | A valley flashing | M/ft |
| Fascia | A fascia flashing | M/ft |
| Gutter | A gutter | M/ft |
| Apron | An apron flashing | Mft |
| Barge | A barge (rake) flashing | M/ft |
| Step | A step flashing | M/ft |
| Batten | A batten material | M/ft |
| Flat Sheet | Flat sheet metal for custom flashings | Each |
| Fabrication | The total fabrication cost of the custom flashing | Each |
| Fasten | A fastener type | Boxes |
| Clip | A type of clip for standing seam panels | Boxes |
| Accessory | A flashing accessory item. | Each |
| Membrane | A membrane material | Roll |
| Roof tiles | Roof tiles | Each |
| Ridge tiles | Ridge tiles | Each |
| Hip starters | Hip starter piece | Each |
| Apex tiles | Apex piece | Each |
| Roof shingles | Roof shingles | Each |
| Ridge shingles | Ridge shingles | Each |
| Apex shingles | Apex shingles | Each |
| Roof shakes | Roof shakes | Each |
| Ridge shakes | Ridge shakes | Each |
| Apex shakes | Apex shakes | Each |
| Starter course | Starter course material for shingle and shake roofs | Each |
| D Pipe | A downpipe | Each |
| D Access | A downpipe accessory which could be a pop, offset, shoe or elbow. | Each |
| Extra | An extra item read in from extras.dat | Each |
| Insulation | An insulation material by the roll | Large or small |
| Ccharge | The curving charge | One off |
| Cflash | A curved flashing | Each |
| User Length | A user length value (eg vermin proofing, bird stop etc.) | M/ft |
| User | A user defined item | Each |
| Misc | A user defined item from Misc-Item | Each |
| Cartage | The number of items to deliver | Each |
![]() Note: There’s currently no way to order the items within each group (Roof/Wall Cover, Flashings/Fittings, Accessories, Fasteners) in the Supply list dialog. However, you can decide what appears in each category group, as well as the individual names of the groups. It requires you to define a category sort file.
Note: There’s currently no way to order the items within each group (Roof/Wall Cover, Flashings/Fittings, Accessories, Fasteners) in the Supply list dialog. However, you can decide what appears in each category group, as well as the individual names of the groups. It requires you to define a category sort file.
A file external to the software “Categories.CSV” saved in the \User folder, can be defined which allows for modification of these items. See the example here opened in MS Excel:
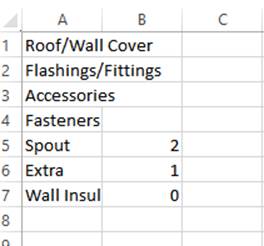
The first 4 lines define the names of the Category Groups in the Supply & Install dialog.
The remaining lines after these first 4 define category names and which category group they should be placed within. The software has default options built into it, but in my example here you can see that I am placing anything with a Category name of “Spout” into Group 2 (Accessories), anything with a category name of “Extra” into Group 1 (Flashings/Fittings) and anything with a category name of “Wall Insulation” into Group 0 (Roof/Wall Cover).
Quote-Groups
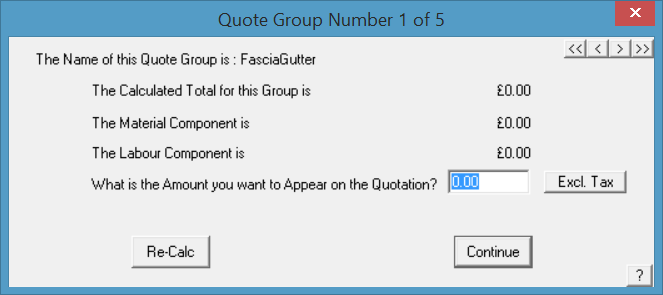
This button takes you to the Quote Groups section showing you the prices for each quote group setup previously.
Each group contains the line items that will be ‘agregated to create a single total cost for that group of items so that a sub-total cost for this group can be displayed on the quotation. Thus not displaying each line item cost in the quotation.
The example below has five Quote Groups – Fascia and Gutter group is dislayed.
Double click the line item description allows you to change the item description for any of the items listed. The change you make is relevant to this quotation only and does not effect the definitions previously set under Materials. Change as required.
Any line item displayed in the Supply and Install list can be modified by double clicking the line item. The description can be changed and a calculation can be typed into the field.
Export Acct.
This button allows the details of the costing screen to be exported to a file that may be read into your accounting system. This presumes that your accounting program can read such files. The path for writing the file would be such that the accounting program picks it up and reads it automatically. The format is a simple comma separated values file (CSV) with each item listed as displayed in the costing dialog..
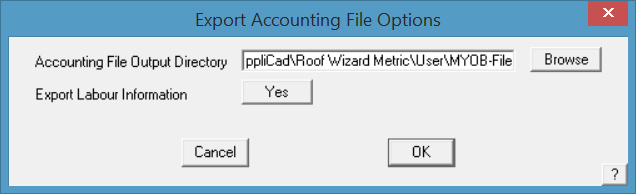
Similar to this:

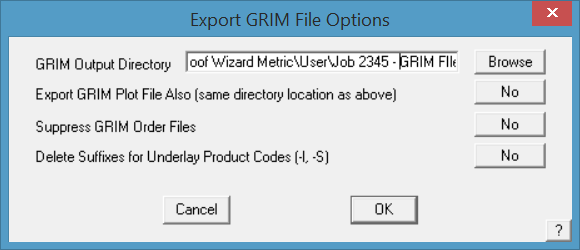
Export GRIM
The Export GRIM button saves atext file in the format of AppliCad’s proprietary GRIM format. This provides a method of exporting every single bit of information anout the job from material and labour costing to panel and trim cutting lists. The GRIM file is described in detail here.
Delete Use this button to delete a previously saved quote.
Notes When you click Notes, you next click the form report name you wish to attach a note to. For each of the forms, if it has a ###QQnote key-text-string, then the relevant note will appear on that form. When the note is formatted on the report, line breaks you typed in are ignored since the notes will span the “text width” value of the ###QQnote text entity. If you want to force a line break, you must use the ^ (carot) character. The standard notes are defined under Tools > Define Notes.
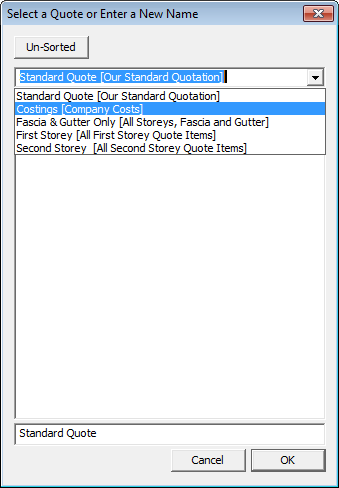
Save You can save this quote by clicking Save, then entering a name for this quote. Then you can redo another quote if you wish. The job details are saved in the Quotation Register and listed by date and time. Refer to Quotation Register explanation in the next section.
![]() Note: If you define a text file called QuotePresets.dat (refer section 6) you can pre-set a series of pre-defined quote names to ensure that the standard quote name is used or simply to speed up the process. Once defined, the available names are displayed when you select Save from the Nett Only, Supply Only or Supply and Install dialog box.
Note: If you define a text file called QuotePresets.dat (refer section 6) you can pre-set a series of pre-defined quote names to ensure that the standard quote name is used or simply to speed up the process. Once defined, the available names are displayed when you select Save from the Nett Only, Supply Only or Supply and Install dialog box.
Load You can load a quote you have previously saved for this job.
Print Here you can print to any predefined reports. You can select the reports you want to print on the select [Reports to Print] dialog box similar to that shown below. The reports listed may include any extra report templates that you may have created.
Refer to the section later in this manual for how we create report templates and add them to this list.
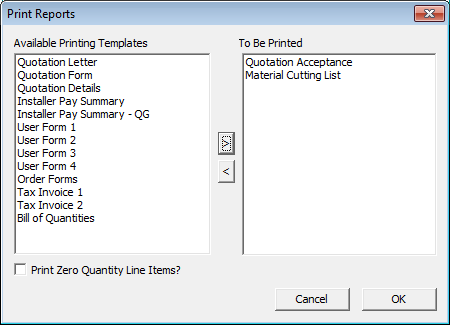
After you click [OK], each report is prepared and then sent to your printer. Like the other reports, the order forms are first pre-processed, generating one or more individual orders for each supplier. The order number on the job details dialog box is used to uniquely identify each order form.
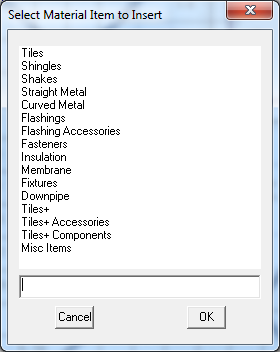
Add Item
This allows the operator to add a material item from any category in the material database. Select the material category, then select the required item to be added to the material list for this job only. The added items do not relate to the roof geometry at all.
Add Other
This adds a new field to the end of the list allowing you to enter any information into the Category, Supplier and Description fields. This has replaces the User fields seen in previous versions. This is used to add such things that are required on a job that cannot be quantified as a function of the roof geometry, such as site clean up, crane hire etc.
Tile-Waste
This button displays the tile waste summary dialog box. Here you can modify specific tile waste factors for the current job. This only applies to tile roofs.
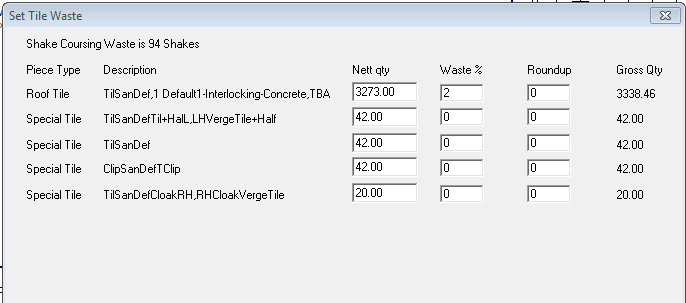
When you click “Calculate”, the Gross Qty is updated with respect to the waste percentage value and the round up value. When you click “[OK]” the Gross Qty is transferred back into the Reporting dialog box.
Cancel You can cancel any changes you have made and close this dialog box
ExportCSV This allows you to write the table of information on this dialog box to a comma separated value file, ready to import into other computer systems
ExportGRIM This allows you to write the current job as a GRIM file. If you have given this job a quote number then the name of the grim file is <Quote Number>.GRO. If you have not, the name of the grim file is GrimFileOut.GRO.
You also get separate grim files defining the materials required from each supplier. These are named Order-<Job Number>-<Index>.GRO. The format of a GRIM file is dewcribed later in this manual and how the GRIM file is used in conjunction with external systems such as a business management system.
A plot file of the roof plan is also exported in HPGL format that may be used to illustrate reports in other systems. It is saved as GrimOutFile.plt into the …\User folder.
A TIFF bitmap image file is also created. If a job number exists, then the file is called Job#.TIF. If no job number is defined, then it is called GRIMOUTFILE.TIF.
Set-Suppliers
This allows you to set the supplier for each material line item. When you click this button, the following dialog is displayed.
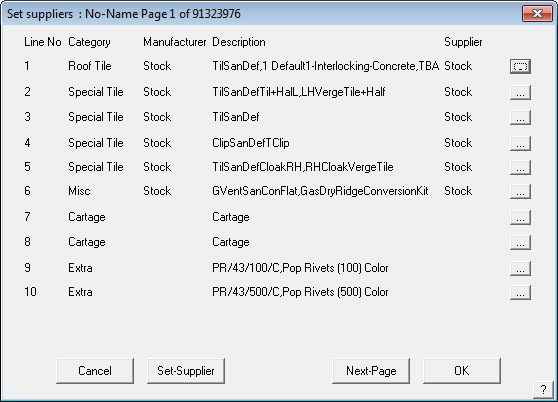
On this dialog, you see the supplier for each material line item. By default, the initial supplier name is the same as the supplier. To change the supplier you can either click the Set-Supplier button or click the ‘…’ to the right of each line item. If you click the Set-Supplier button, you can set a range of line items to affect.
Set-Finishes
This command lets you set the finish for any or all the material line items. It operates in a similar fashion to then Set-Suppliers command.

Set-Discount This button will let you set the discount for all line items.
Next-page This will display the next page, if there is one.
Prev-page This will display the previous page if there is one.
[OK] This lets you close the dialog box.
List Existing Quotes
Each time you select Supply-Only, or Supply and Install the software wants to re-calculate the quotation with the latest details and prices.
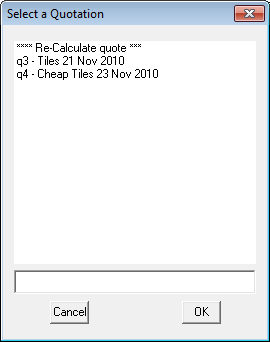
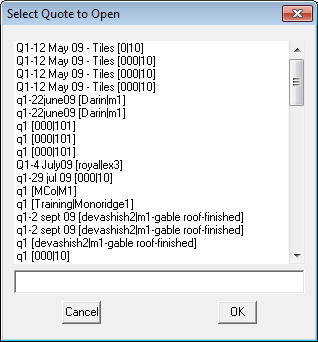
If you have already saved a quote using the Save button, when you select Supply-Only you are presented with a list of quotes in the job similar to the list box to the right.
Here you can select an existing saved quote, or select ***Re-Calculate quote *** to recalculate the quote with the latest values.
This also applies to the Supply&Install, Nett-Only and Fascia&Gutter Reporting commands.
Quote Register
The software automatically creates a register of all quotes completed, in the order they are completed. This makes it easy for the operator to go back to a previously saved quotation. In the process, the job database and model are opened and displayed on screen.
The Quotation Register is saved in a CSV (Comma Separated Values text file) format which allows the register to be used by other software such as Microsoft Excel or a business management system. The file name is QuoteRegister.CSV.
The file is in the form as shown below:
Quote Name,Database,Model,Date,Time,
...
 Q101-12May09-Tiles,BennetBldrs,34HighSt,29-May-09,14:29:03,
 Q102-12May09-Tiles,BennetBldrs,34HighSt,29 May 2009,14:29:48,
 Q103-12May09-Tiles,BennetBldrs,34HighSt,29 May 2009,14:30:47,
 Q103a-12May09-Tiles,BennetBldrs,34HighSt,29 May 2009,14:30:47,
 Q103b-12May09-Tiles,BennetBldrs,34HighSt,29 May 2009,14:30:47,
 Q104-12May09-Tiles,BennetBldrs,34HighSt,29 May 2009,14:31:50,
 ... Etc
The Quote Name is extracted from the name given to the quotation when it is saved from the Nett Only, Supply-Only or Supply+Install screen dilaogs. The list is continuously created until the data is deleted.
Some situations may require more data to be saved with the quotation list. For example, in addition to the Quote name, Database name, Model name, date and time, you might need the job cost total. To achieve this you must create a template (similar to creating a GRIM file template – refer description in Section 6 of this manual) that adds the extra information.
The template uses key text strings, as used when setting up your report templates, in the order that the data is to appear in the list. One small difference to how it is used in templates is the need to include .DAB to the end of the ###DatabaseFileName string. You create the text file using a text editor such as Notepad and the file must be called QuoteRegister.GRT (GRT as in GRIM Template). Let’s add the job total price to our Quotation Register and the first line of the file would look like this:
###QuoteName,###DatabaseFileName.DAB,###DatabaseModelName,###Today,###Time,Job Total is: $###JobTotal
This has the effect of adding the text, Job Total is: $. Then the key text string adds the dollar amount. When the Quote Register is created, and subsequently added to, the extra information is also added.
In our example, a section of the Register would now look like this:
Quote Name,Database,Model,Date,Time,
...
 Q101-12May09-Tiles,BennetBldrs,34HighSt,29-May-09,14:29:03,Job Total is: $158.69
 Q102-12May09-Tiles,BennetBldrs,34HighSt,29 May 2009,14:29:48,Job Total is: $168.12
 Q103-12May09-Tiles,BennetBldrs,34HighSt,29 May 2009,14:30:47,Job Total is: $258.34
 Q103a-12May09-Tiles,BennetBldrs,34HighSt,29 May 2009,14:30:47,Job Total is: $245.36
 Q103b-12May09-Tiles,BennetBldrs,34HighSt,29 May 2009,14:30:47,Job Total is: $228.34
 Q104-12May09-Tiles,BennetBldrs,34HighSt,29 May 2009,14:31:50,Job Total is: $162.69
 ... Etc
The extra text, Job Total is: $ and the dollar value added. This set up of the QuoteRegister template can be set up to be as complex or as simple as required for providing the information you need to help run your business.
Headings for each column of cells that you define, in addition to the Date, Time etc, must be manually inserted in to the CSV file the Job Total is: $ for example. The heading would then read:
Quote Name,Database,Model,Date,Time,Job Total is: $
Recalling Jobs from the Quote Register
When going back to a job, the operator has the option of simply opening the Database and Model, or you may use File > Open Quote. This presents the full list in the Quote Register in chronological order. Select the quotation you wish to open and the software opens the right Database and Model and then accesses the quotation.
Modify Quote Total
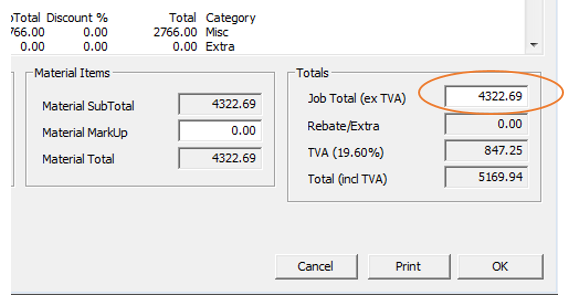
This option allows the operator to modify the final total quotation price for the job and will be saved with the quotation.
Select the [=] button and a box is displayed that displays the job total price calculated by the software based on all materials (and labour) for that job. This may be adjusted up or down, and the new job selling price inserted. This new value is displayed in the Job Total (ex tax) and a new line item displayed which is the value of the adjustment to the job total, up or down.
This is described as a rebate or extra and is saved as a Key Text called ###Rebate (refer Appendix). Such variations to a customer’s quotation can then be displayed on the office or sales person’s copy of the quotation by adding the Key-Text String to the office copy template.
Left click in the field that you wish to modify, in this case the Job Total, change the amount to that required and the adjustment will be shown in the Rebate/Extra field, as shown below.
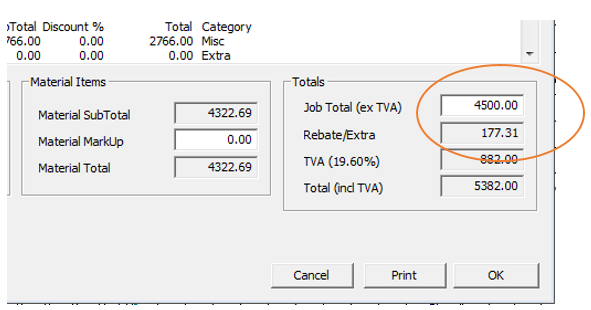
A negative number is a Rebate or discount, a positive number is an Extra or additional amount. Sales tax is applied if defined in System Preferences and the Total (including tax if applicable) is displayed and this is the amount printed on the customer’s quotation.
Job-Info and Options
The [Job-Info} button on the Supply-Only dialog allows you to change details about the Job, Customer, Installer etc without having to back up out of this dialog and have it recalculate the costings.
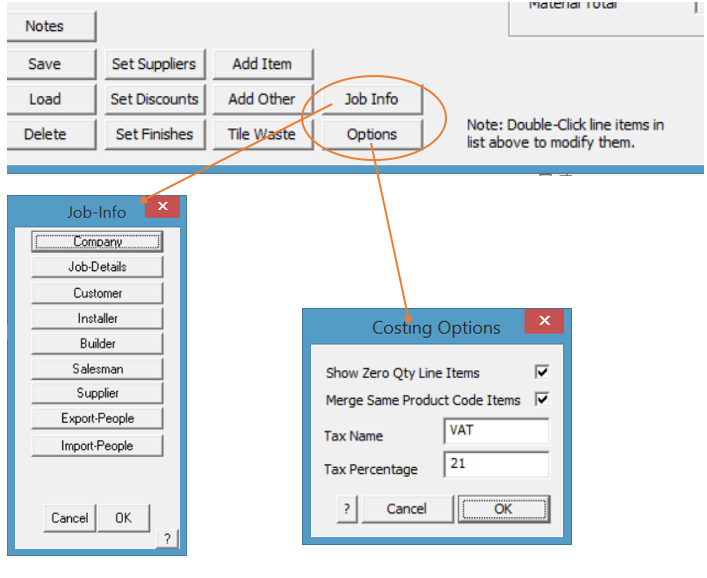
The [Options] button takes you directly to the Preference Settings that relate to the job costing dialog screen without having to back up out of this dialog and have to recalculate all the values.
![]()
Note: This is only saved with the current estimate if you select [Save]. If you quit the Supply+Install dialog without saving, these changes are lost.
Comments are closed.