Roof Outline Template
Creating/Using Roof Outline Template
(Pulldown menu only)
Create Roof Outline Template
This command provides the function to create a roof outline that may be saved for later recall and modification to re-create a new roof. If you have a series of similar roof geometry that you estimate over and over, this will save you a lot of time.
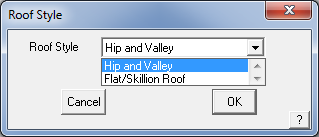
Select the command and the following dialog will be displayed prompting the operator to select construction constraints.
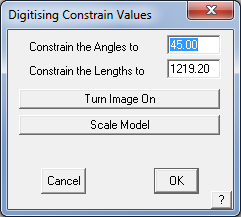
The operator is prompted for a start point from where you will start digitizing the rough roof shape. It is usual to start at the origin of the work space and you do this by typing 0,0 then enter. A cross hair is displayed waiting for the next construction point to be inserted. A displayed on the top left of the screen also shows the coordinates of where the cross hair cursor is currently pointing, thus giving the operator a guide as to how long the line will be when inserted.
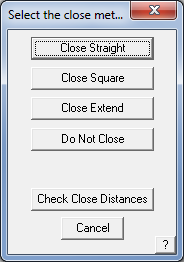
Left click a location and the line is inserted. [Continue] around the job until you reach the second last point in the outline. Select right button on the mouse and the Close options are presented. Select Close Square.
The construction outline is displayed in full and the dialog prompting the operator for a template name:

Enter the required details and then click [OK]. The outline is saved.
To create roof template outline
It may be recalled by selecting Construct Roof > From Roof Outline Template.
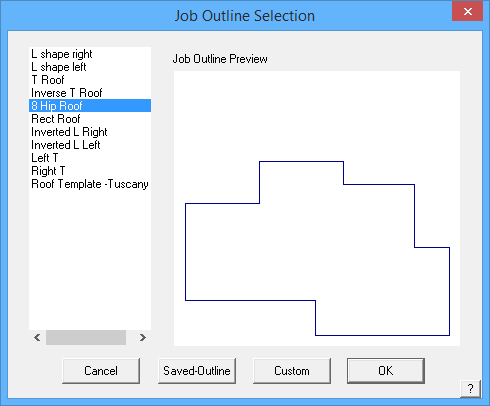
From Roof Outline Template
To use the predefined outline, simply select the command and the dialog box above is displayed showing you all your predefined roof outlines. Select the required outline.
The direction
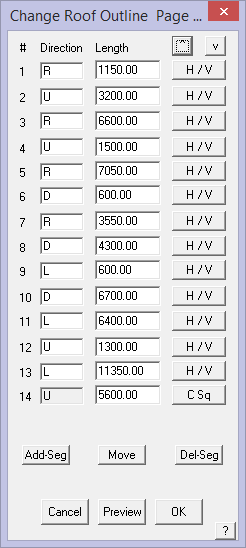
and distance of each side are displayed in the Change Roof Outline dialog box. You can then change a direction or distance as required to create the wall outline you require. You have the opportunity to change the length and direction of any of the lines.
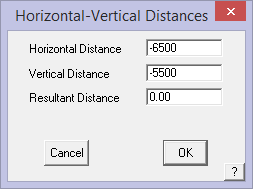
Click the H/V button and the second dialog is displayed and this provides for changing each line in turn or as required. With horizontal lines, a positive number is directly equivalent to moving Right, a negative number is directly equivalent to moving Left. Similarly, with vertical lines, a positive number is equivalent to Up and negative is Down.
Occasionally the outline you recover has the start point at a location which is not convenient for what you need to do. The [^] and [v] buttons allows you to change the starting point for the outline. This is particularly useful if you have barge lines in the job and you need to move the start point to be more than two points away from a barge line.
Add-Segment Clicking this button lets you add a new wall segment after a specified segment. You then enter the bearing and distance of the new wall segment.
Delete-Segment This button lets you delete a specified wall segment.
Move This button prompts you to enter a shift in both horizontal and vertical directions which then moves the entire outline by that amount.
Preview Draws the outline in temporary graphics so you can preview any changes before accepting the outline.
[Cancel] Any changes you have made are discarded and the process stops.
[C Sq] This button takes the preceding outline with any changes that you might have made and recalculates the close square values. It is useful to select this after any changes to the outline at all.
[OK] The command carries on with constructing the roof
![]() Note: Other changes you have made to the roof geometry (using the Modify Roof commands) are not maintained in a recovered outline. They must be added again.
Note: Other changes you have made to the roof geometry (using the Modify Roof commands) are not maintained in a recovered outline. They must be added again.
It is useful to select [C Sq] after any changes to the outline at all.
Then select [OK] and continue to the Roof Defaults dialog to define the geometric parameters of the roof as you would with the Track-Outline command.
Comments are closed.